Outgoing Email Settings for Google
- Evangeline Cruz
Analytics
Alternative way to Setup your SMTP
1. Login to G-Suite admin – https://admin.google.com/
2. Click the hamburger menu at top-left and navigate to Apps -> Google workspace -> Gmail
3. In the opened Gmail settings page, Scroll down and choose Advanced Settings
4. In advanced settings page, Scroll down and see section “SMTP Relay service”.
5. Move the mouse over the section to see the “Edit” button. Click that “Edit” button.
6. On Edit mode, (refer to screenshot)
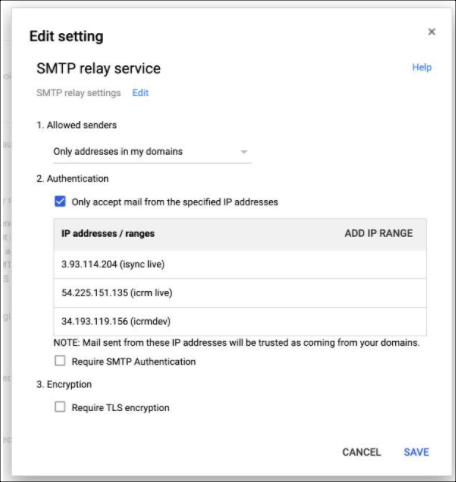
a. Allowed senders choose “Only addresses in my domains”
b. Authentication choose “Only accept mail from specified IP”
c. Click "Add IP Address" and enter these values
i. Description : icrm
ii. IP range : 54.225.151.135
iii. Click “Save”
d. Disable checkbox “Require SMTP authentication”
7. Click “SAVE” to save these changes
8. Login to iCRM
9. Click Setup from the Toolsbar and select Global Settings.
10. Click Outgoing Email Setting on the left panel. Refer to screenshot.
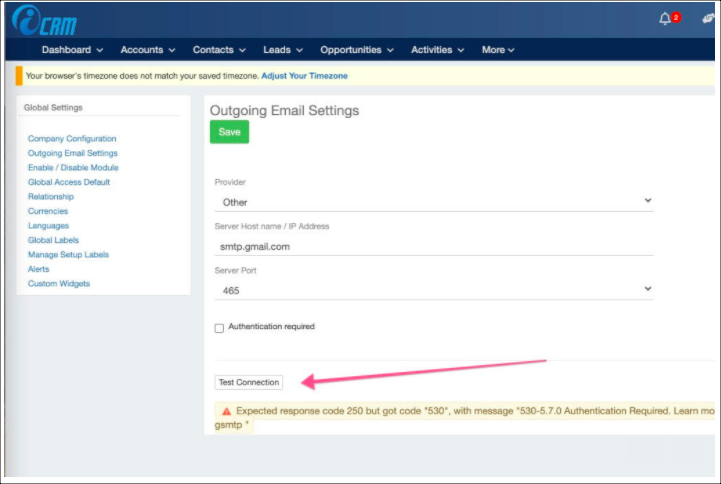
11. On the Provider dropdown, select "Other".
12. On Server Host Name, enter "smtp.gmail.com"
13. On Server Port, enter "465"
14. Click Save
15. Click on Test Connection to confirm. Make sure you get a Success message.
Current user is the sender.
SMTP should allow routing emails with any domain users as sender.
Search this Product