Skip to end of metadata
Go to start of metadata

You are viewing an old version of this page. View the current version.

Compare with Current View Page History

« Previous Version 12 Current »

The installer file is typically provided to you by registering on the iEnterprises.com or via appexchange for Salesforce.com user.


Installation Notes:

  • Whoever runs the Notes Connector Installer must have Designer or Manager Access in the ACL of the target Mail File or Mail Template File, or the File will not be updated.

  • Once Installed, the Mail File or Template should be signed with the appropriate trusted Notes ID to avoid any Execution Control List errors. Refer to your Domino or Mail Database Administrator.

  • You must use an equal or higher version of the Lotus Notes Client compared to the version of the target Mail File. EX: When selecting to update a Mail Version 8.5.1, you must use a Notes Client 8.5.1 of higher to run the Notes Connector Software.


This Installer updates the design of the Mail File or Mail Template. You should discuss any update to a Mail Template with your Lotus Notes Administrator as it could affect other 3rd party elements that have been installed previously. We recommend creating a separate Mail File for the Connector trial should there be concerns.


How to Run the LNC Client Installer:


1.  Once you have downloaded the "Client Installer" zip file, unzip file that contains our Lotus Notes Connector client plugin Installer.

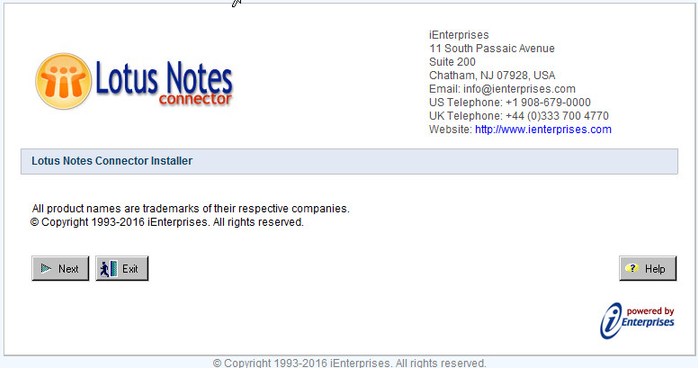
2.  Open your Notes Client and Open ConnectorInstaller.nsf.  Click 'Next' on the opening page.

 
 3.  Click on “I Agree” to the License Agreement and click OK.
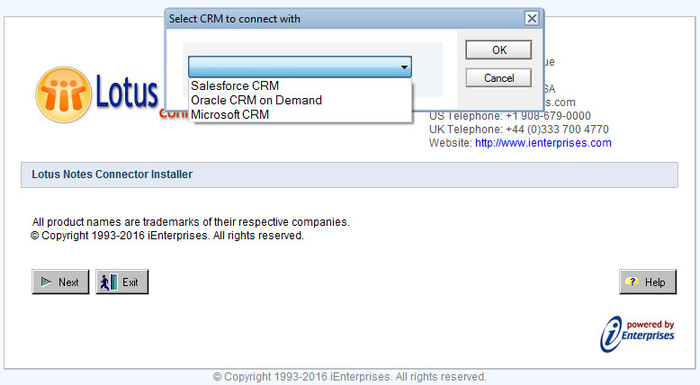
 4.  Select your CRM on the dialog box and click OK.


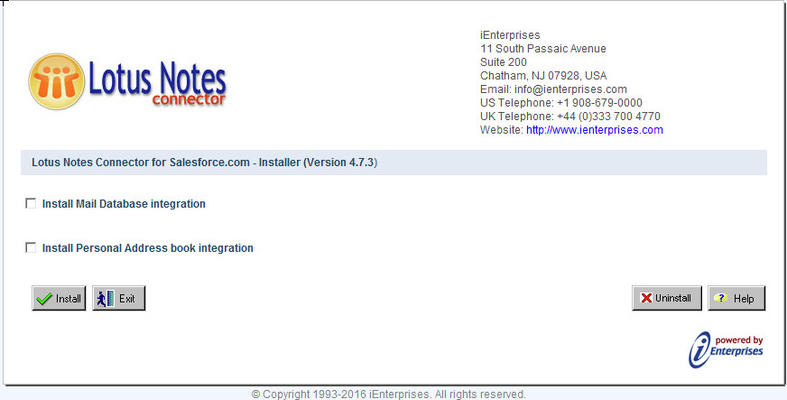
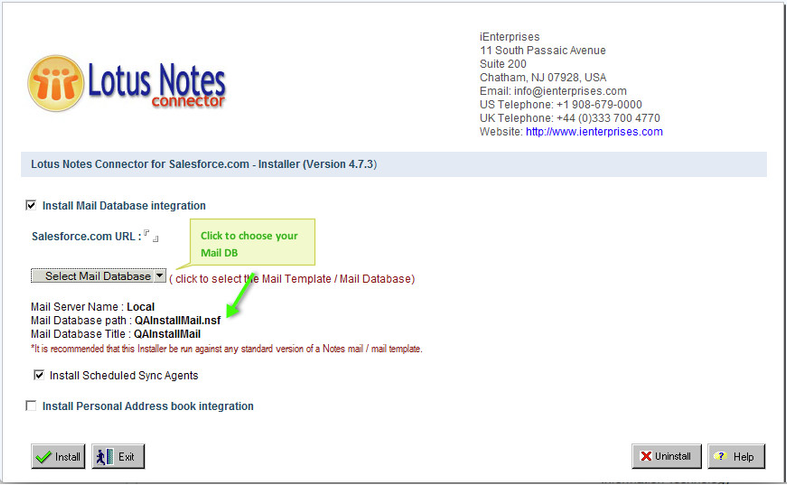
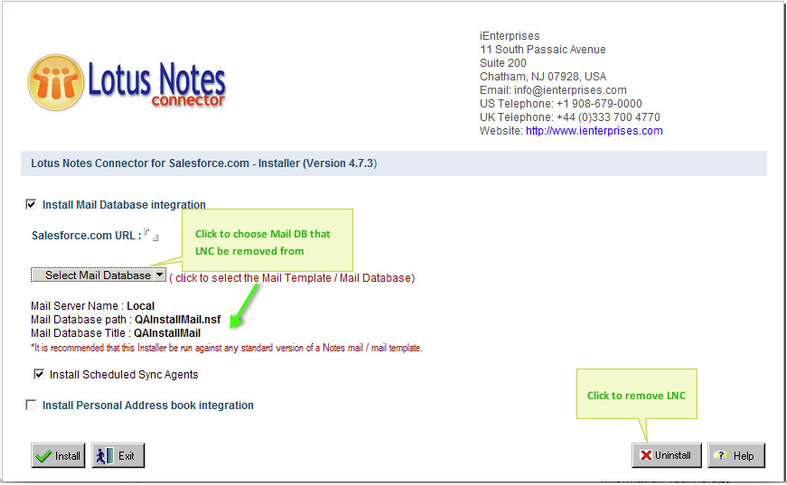
 5.  In the Configuration window, select the box "Install Mail Database Integration"

6.  On the dialog, type your CRM URL. If you do not know your target CRM URL, you may enter that when activating the Connector after installation.
     Click the "Select Mail database" button to select the Mail File\Mail Template file you want to update.


Checkbox "Install Scheduled Sync Agents" is selected by default. This automatically runs the sync agents as part of the install.  If you would rather run this manually, deselect the box.


7.  Optional :

Click the option to Install Personal Address Book Integration if desired. This feature will allow you to access your PAB through the LNC interface, as well as access your CRM contacts from your PAB.


If the Connector will be deployed organization-wide using the Designer then this checkbox must not be enabled.

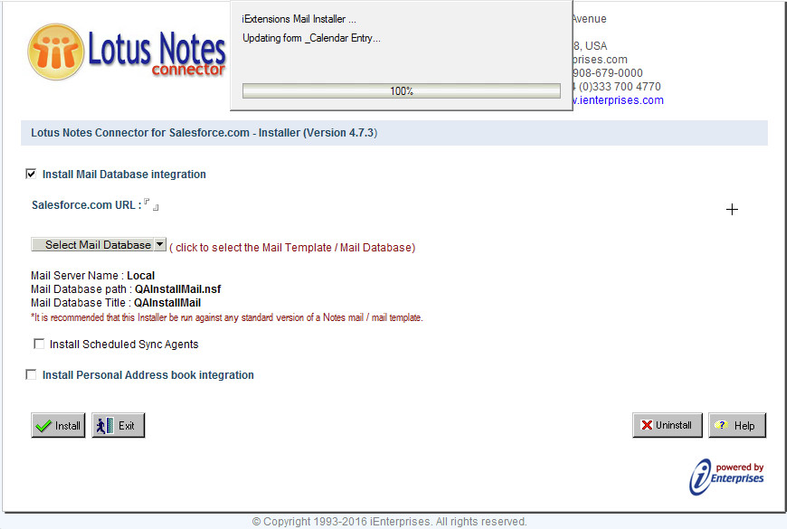
8.  Once all fields are entered, click the Install button.  You will be prompted to confirm Installation, select Yes to continue.  

You will see the progress bar.

The Install may take some time, it is best to close and reopen Notes once installed.

Administrator Note: If your Connector deployment method will be via a Mail Template, you should still choose “Install Personal Address Book Integration” to your local address book. You can then create a copy of names.nsf as a Template on the Server and use that Template to deploy the design elements to the other user’s local address books.

If you get errors that list forms not found or could not be updated, then you did not have sufficient access rights in that mail file’s ACL, and will need to have the operation performed by your Mail File Administrator, or use a Notes ID that does have sufficient access rights in your mail file. 

For Manual Installation (to preserve other 3rd party elements or custom design features), refer to the manual installation instructions in the Help file URL at this end of this guide. These instructions are also in the ‘Help -> Using this Application’ menu item of the Installer program.


Activation of the Lotus Notes Connector

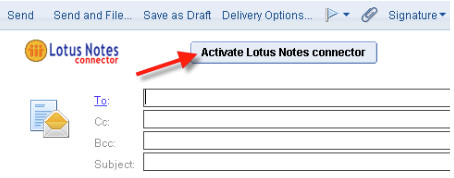
From here, you will still need to activate your Lotus Notes Connector. Open your mail file, and start a new memo to see the activation button. Click this to Activate.
Open the mail file click on New Memo, and you will see the Activate Lotus Notes Connector button in the Mail header. This will open up the Settings UI, where you may then enter the CRM URL, along with your CRMOD User Name and Password.


This is also where you may choose to enable/disable the Calendar and Task sync agent, perform a manual sync, and make use of other features in the LNC.

Settings Features (not all features listed will pertain to your LNC installation, as they are Data Source dependent):


URL - The URL of your Data Source
Override URL Use only if there is a default URL supplied is not the default location. This pertains to Salesforce.com, and your SFDC Administrator can tell you the URL to use.
Authentication Type (Dynamics Only)There are 3 types of supported authentication: On Premise (AD), Online (Claims), and IFD (Claims).  As your CRM Administrator if you are not sure which type to select.
Security Token (Salesforce Only) 
– Required by SFDC for authentication. Click the ‘?’ icon for instructions on getting your security token if you do not know it.
 Mark Emails Completed by Default Any email associated to a contact in your CRM will be marked as completed automatically.
Allow Automatic Association of Contacts in Emails
– If a sender’s email address matches one in a contact/Lead record in your CRM, then that email will automatically be associated to that same Contact/Lead.
Enable Proxy
Check this box to open the Proxy Setting UI. This is only required if your Company’s network uses a Proxy Server. If you are unsure if you are using a Proxy Server, speak with your Network Admin of Support Tech.
 Debug Mode Use this section only when requested by a support tech. It is for troubleshooting purposes.
Connect Using - The API for background connection to the Data Source.  Mac only allows the Java API, PC allows the Windows or Java API (Windows API is recommended).
Check for Updates - Connects to the iEnterprises LNC Server and compares your LNC version to the currently available release.  You will be notified if your version is not the latest release.
Body Field Max Length - Sets the max character count that will be sent to the Data Source for the Body of an Email/Task/Appointment.  The Data Source defaults have been pre-entered.


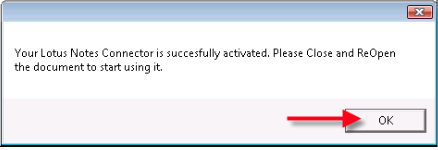
Once you have all settings in place and click "OK", you should see a message telling you that the activation was successful. Click OK to continue.  If there were problem in the activation due to a mis-typed password or incorrect URL a message will appear saying that you were unable to connect, and you will need to re-check your settings.  If you can not tell the reason upon further examination, then open the settings panel, activate the Debug Mode checkbox mentioned above, and continue activation.  You will see a series of message windows containing an XML output.  Save these (Screen shots) as well as the expanded notes status bar messages, and send to support@ienterprises.com.


Additional Settings Sync Options
 During the initial activation, or at any point after, you may click on the Settings link in the LNC Interface, and make changes to the options. In the Calendar & Task Sync section, you will have additional options to specify what activities are passed to and from the Data Source, and certain criteria to exclude (such as excluding completed tasks from the sync settings).

  
The Sync Agent is already on a schedule and will run if enabled. At any time you may open the Settings Panel here and choose ‘Sync Now’ to launch the Sync Agent. 


Activation Notes:


The user performing the activation will need to confirm they can login directly to the Data Source using their login credentials. If the user cannot login to Data Source, the LNC activation will fail.
The user’s Data Source profile requires web services privileges. If all Credentials are correct, then confirm with the Data Source Administrator that the user profile can send web service requests.
If the user requires proxy authentication to access the internet, proxy settings will need to be enabled in the Connector settings screen.
 

Firewalls will need to allow access to the iEnterprises Activation server at the following URL and IP Address:

  https://activate.ienterprises.com/activate/getservice 

 IP Address: 107.20.233.220

 If you have any problems setting up or using the Lotus Notes Connector please refer to the help file and troubleshooting files.

 If you require further assistance, email support@ienterprises.com


A Note for Mail DB Admins:

Certain elements of the Lotus Notes Connector plugin are protected against design Refresh/Replace, and as such just running a ‘Replace Design’ command will not remove the LNC from the Mail File.
The Uninstall feature removes both that protection, and then the element itself. You may do this manually in Domino Designer, also, by locating the LNC elements and unchecking the box for ‘Prohibit Design Refresh/Replace’.

Manual instructions are included in the Installer Help File in the ‘Help -> Using this Application’ section in the Notes Action Bar of the installer program.

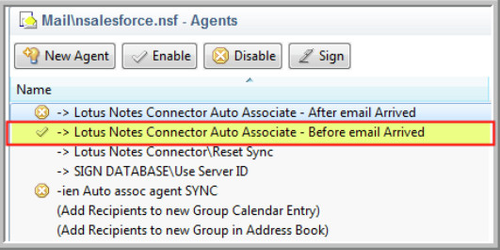
Version 4.2.1(fp1) and above (SFDC Only): This version includes a background agent that can look up a sender’s address in your SFDC as the mail is received, and if there is a matching email address then the message will be automatically associated to that Contact/Lead prior to the email being viewed by the recipient. This agent can be enabled per user, or beforehand if you are using the Master Template option for deployment. Like all scheduled agents, it needs to be signed by an ID with sufficient agent execution rights on the server. You will need to enable “Lotus Notes Connector Auto Associate Before email Arrived”. If the load becomes too great on the Mail Server, then disable and enable the other agent, “Lotus Notes... - After Email Arrived”.


Uninstalling the Lotus Notes Connector Plugin


We are sorry to see you go.

1.  To remove the Lotus Notes Connector plugin elements from your mail file, you will need to open and run the installer again.

2.  On the screen where you select your mail file to be updated, you will select the target mail file as before. Click the ‘Uninstall’ button in the bottom right.
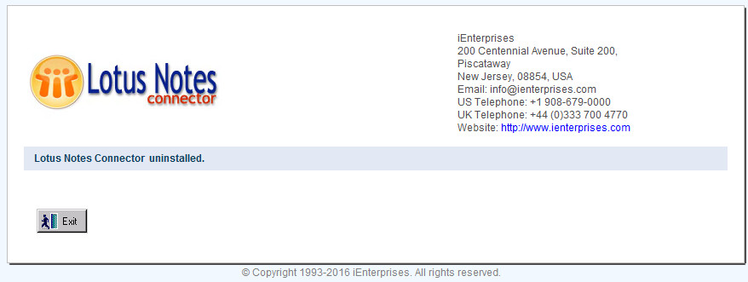
3.  Confirmation screen opens that LNC plugin is removed.


  • No labels